Avon
CR500 tyres
20/7/2004
 Saturday July
31st was the Bristol
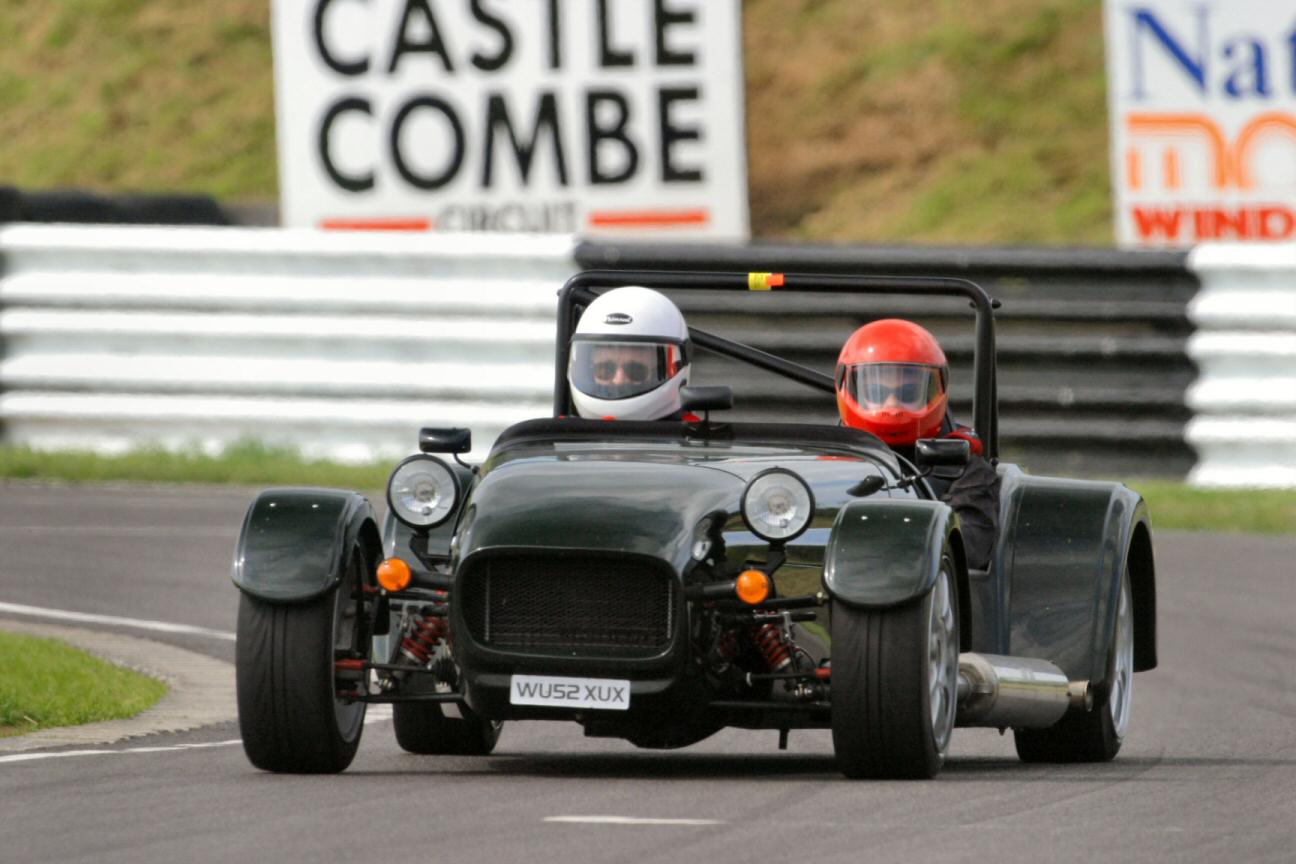
Pegasus Motor Club, Castle Combe Track Day. This was my
first outing on a circuit with my aeroscreen and new sticky tyres (Avon
CR500s) & the car was transformed now Im asking why didnt
I make the change earlier? The grip from the CR500's was
amazing, towards the end of the day I felt my neck aching from the
cornering!
Saturday July
31st was the Bristol
Pegasus Motor Club, Castle Combe Track Day. This was my
first outing on a circuit with my aeroscreen and new sticky tyres (Avon
CR500s) & the car was transformed now Im asking why didnt
I make the change earlier? The grip from the CR500's was
amazing, towards the end of the day I felt my neck aching from the
cornering!
25/6/2004
Dead easy to fit - noticeable effect on top end acceleration.
Feb - June 2004
Edited highlights - Not much help from Westfield. Superb service from SBD and Adrian Clinton-Watkins. Good help from MBE & finally a replacement unit.
The *short* story is ....
Feb: Fault occurred - I spoke to Westfield.
Feb through April: More calls to Westfield & bought parts from them to replace everything that Westfield recommended (fuel filter, spark plugs, plug leads, coil, Crank position sensor, Air Temperature sensor, Water Temperature sensor).
Drained fuel tanks (to check for water), replaced all parts - fault still present.
Several more calls & e-mails to Westfield to try & get help & advice.
Asked lots of questions on the WSCC boardroom about the problem ... here (main problem) and here (EasiMap software) and here (Crank sensor shielding).
March through April: Through my own electronic investigations found out it was probably an ECU problem.
Spoke to Westfield again & sent the results of my investigations explaining it was probably an ECU fault.
Westfield disinterested. Said "contact MBE".
MBE initially said "Westfield are the customer / dealer - we don't deal with the end user".
Told Westfield - who said "There's no point bringing it up to us - we'd only have to take it to MBE"
Westfield wouldn't facilitate contact with MBE.
Back to MBE who said "You can't bring the car here - take it to an MBE dealer - e.g. SBD Motorsport".
More investigations & phoned the results to Westfield - who said it's too complicated electronics & they can't help me. Despair
May: Me, ACW and my brother in-law ran some more thorough diagnostic tests. Sent the results to SBD.
SBD were superb - diagnosed the problem - turned out to be a known fault. SBD spoke on my behalf to MBE.
June: MBE replaced the unit free of charge.
This is a *very* long
story, but to recap some of the basics are:
* The car is a 2.0L
Zetec engined Westfield on Jenvey TBs 18 months and 1500 miles old (when
the problem occurred) built with all
new parts from Westfield.
* The ECU is an MBE 956E with software version 956AA260.
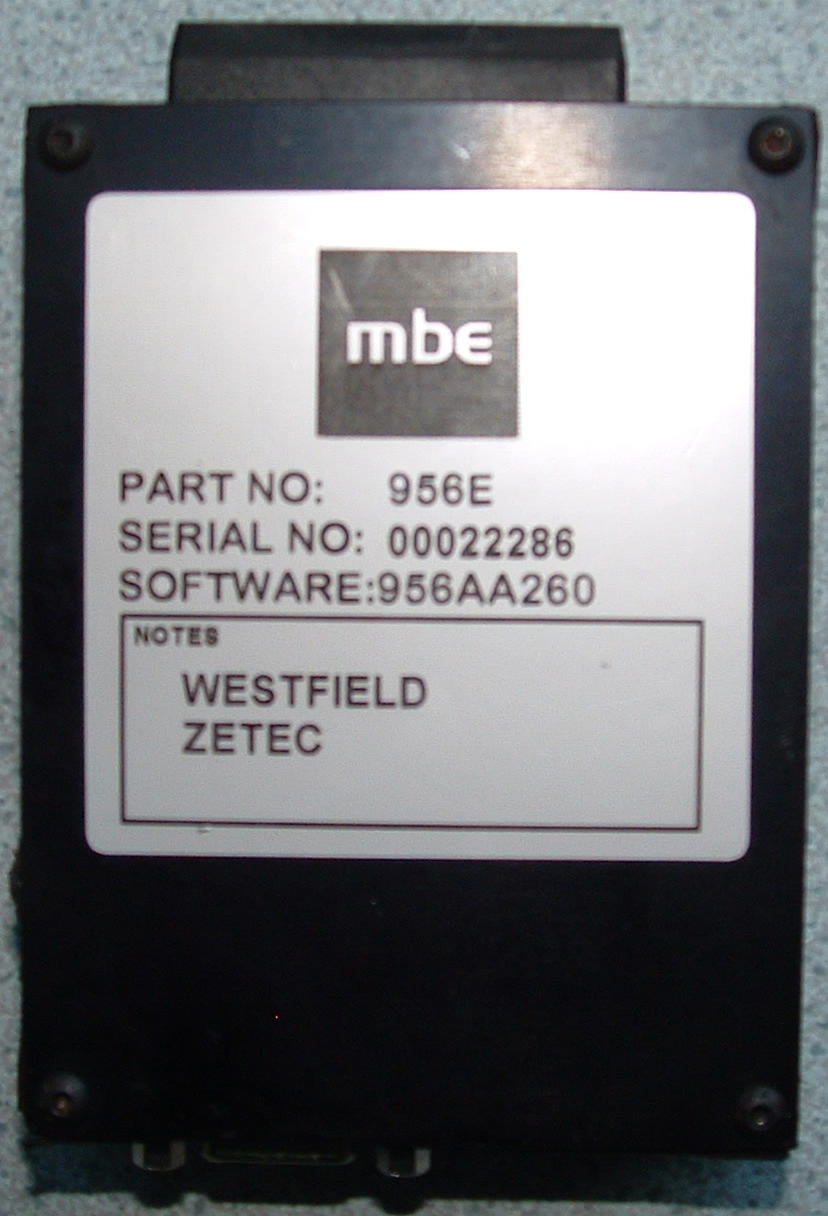 ECU
case image
ECU
case image
The problem first happened in February 2004. The symptoms were that
the car died after about 15-20 minutes running. After about 30
minutes or so it would re-start and the entire cycle would repeat.
After checking for loose wires, water in the fuel, broken connections, I
contacted Westfield several times who each time suggested replacing new
items ... the coil, plugs and ECU sensors. So for the next 3 months of investigations and
many many calls to Westfield I replaced the coil, plugs, leads, fuel
filter & all the ECU sensors but the problem still persisted. I
had regularly contacted the Westfield help line but with little
joy. I really felt left high and dry. Through my own
investigations and with tremendous support from fellow WSCC members
I'd got as far as knowing it was overheating IC's inside the ECU which
resulted in the misfire & the engine cutting out because they were
scalding hot and showed scorch marks inside the unit. The unit would
also come back to
life for another 15 minutes or so when I doused it with electronics cooler spray.
Here's the findings .....we traced it all through with an oscilloscope, digital multi-meter and EasiMap and found the following.
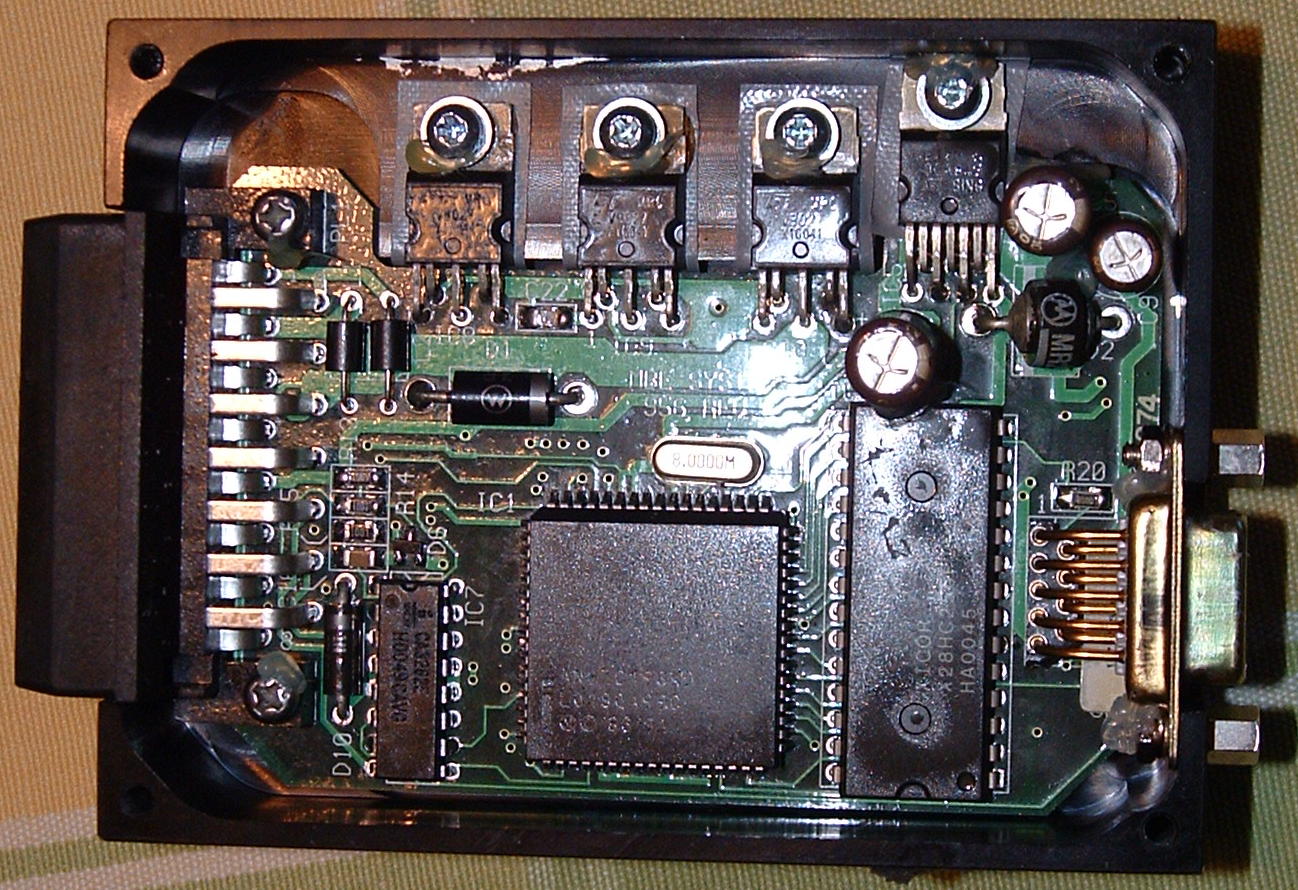 ECU
internals image:
ECU
internals image:
Firstly the two IC's to the left (the suspect ones) control two coil
halves (IC8 and IC9) the fuelling is controlled by IC10.
The Crank Position Sensor (CPS) input to the unit at idle is clean
and sensible and measuring the frequency tied up with the RPM. Checking
the input and output of the power drivers showed good signals coming into
the units and appropriate switching transforms coming out of the units.
No EMI was found on any loom wire.
However we noticed that the two coil power drivers were getting VERY
hot at less than 950 rpm. The Tick over is 900 rpm at present. We
discovered that if you were touching the units as a measure of heat that
quickly at 900 RPM they became far too hot to touch, whereas as soon
as you revved the engine to around 1200 rpm and above they
quickly cooled back down to a reasonable (but still very warm)
temperature. So
using the scope we measured the switching period in ms on the TTL side of
the power driver. We could see that at 900 rpm the coil on time was in
excess of 12ms whereas quickly above 1100 RPM this would drop to
typically 6/7 ms. in addition above around 1500 rpm the reducing coil on
time would be steady at 3ms (i.e. the value reported by EasiMap in the
chipfile).
So it appeared that the dwell angle / time was incorrect in the ECU or at
least far too large at low RPM to avoid over driving the coil and
creating excess heat within the power driver. This overheating was the
cause of the thermal shutdown of the unit.
However we checked the dwell time (fixed) and the dwell time map and made
changes to these with both Easimap 5 and Easimap 4.14d and in both
cases this only actually effected the dwell time as recorded on
the scope above 1500 rpm. Still the dwell below 1500 rpm seemed static to
12ms at tick over.
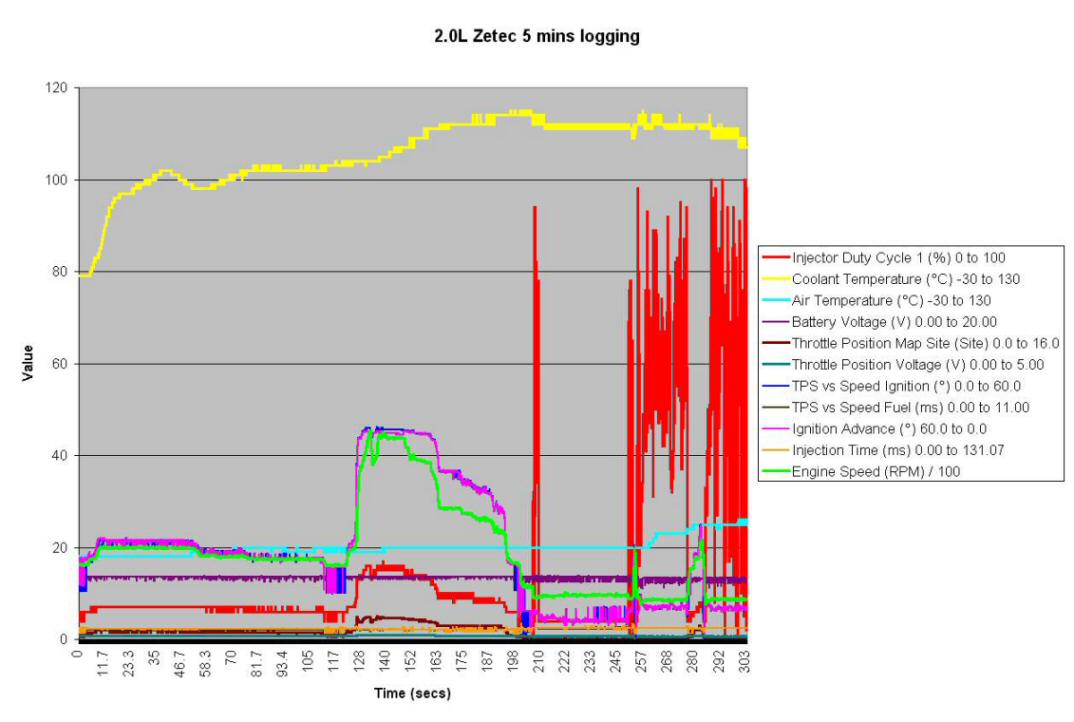 EasiMap
trace:
EasiMap
trace:
We also noticed that the EasiMap reported bad injector duty
cycle only occurred at lower RPM and suspect this is probably processor
errors / firmware issue pertaining to low RPM or possible too high current
drain from the high coil on time. Checking the duty cycle at this
time showed correct injector firing on the output side of the power driver
for the injectors.
As another check we increased the tick over to above 1000 - 1100 rpm
and the unit ran happily for a long time with it still getting quite
warm, but not too hot to touch, and now not failing.
So our conclusion is that there appears to be something odd (firmware) that is causing the unit to use a large coil on time at lower RPM. I suspect that this has always been within this ECU but that in fitting a second throttle return spring has only recently set the tickover low enough to trigger the problem.
At this point we contacted SBD and sent our findings to them. SBD Motorsport were incredibly helpful. As a customer of theirs they bent over backwards to help me. I explained to them that we had "masked" the problem by setting a high tickover and mounting the ECU in a heat sink. I'd explained that I wanted to find out the following:
Can the ECU be repaired?
Should I just have the power drivers replaced?
Can the board be replaced?
SBD came back within a day and explained to me that there was a "known" problem with the 956E firmware which was related to coil on times. They said that the 956E ECU's had been superseded about 3 or so years ago. Also, a year or so before that the final release of the 956E board was software version 463. The one on mine supplied to me in mid 2001 was software version 260. Furthermore they explained that the 260 version was replaced several years before I was supplied mine brand new from Westfield. With this in mind SBD very kindly re-contacted MBE who very courteously offered to replace the main board with a new version having the final release 463 firmware. Within a week the replacement MBE unit was back and everything worked perfectly.
So during this time I'd spent almost 4 months off the road, missed a couple of track days that I'd been booked onto and spent a couple of hundred pounds on parts that I didn't need. Also I felt let down in that having spent almost £18,000 with Westfield over the build that I would have expected a greater level of interest and service. SBD, with whom I'd spent a few hundred pounds with were superb. MBE finally were very helpful and apologetic for the run around I'd had. To say I was unimpressed with Westfield's care and attitude is an understatement.
5/01/2004
 After
the Stroke Association day, the car sat in the garage
for 2 months without being touched - apart from a good clean. After
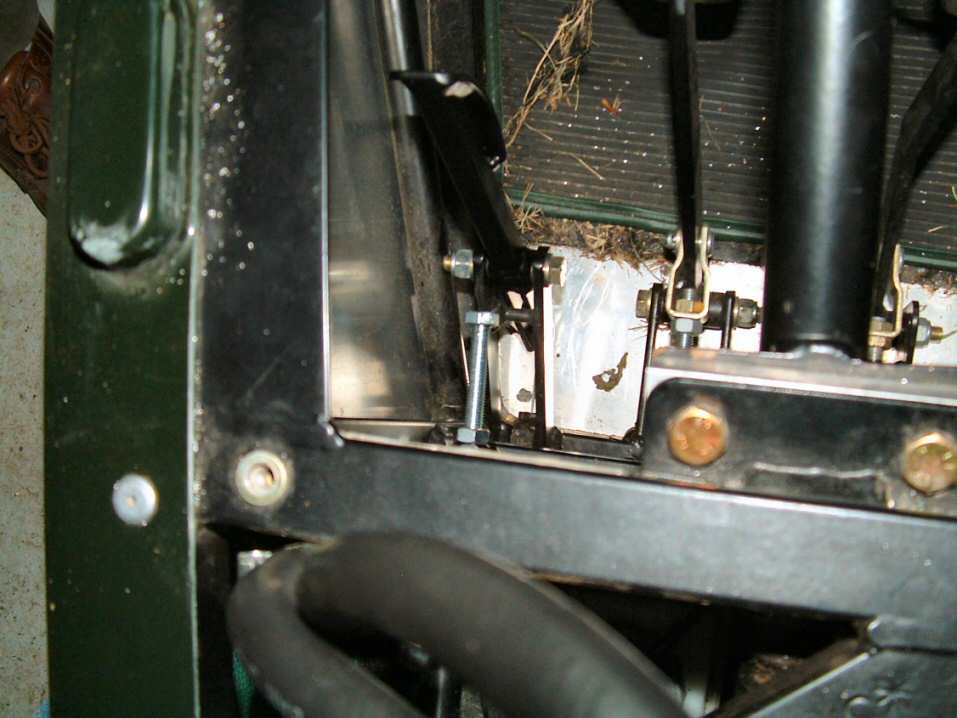
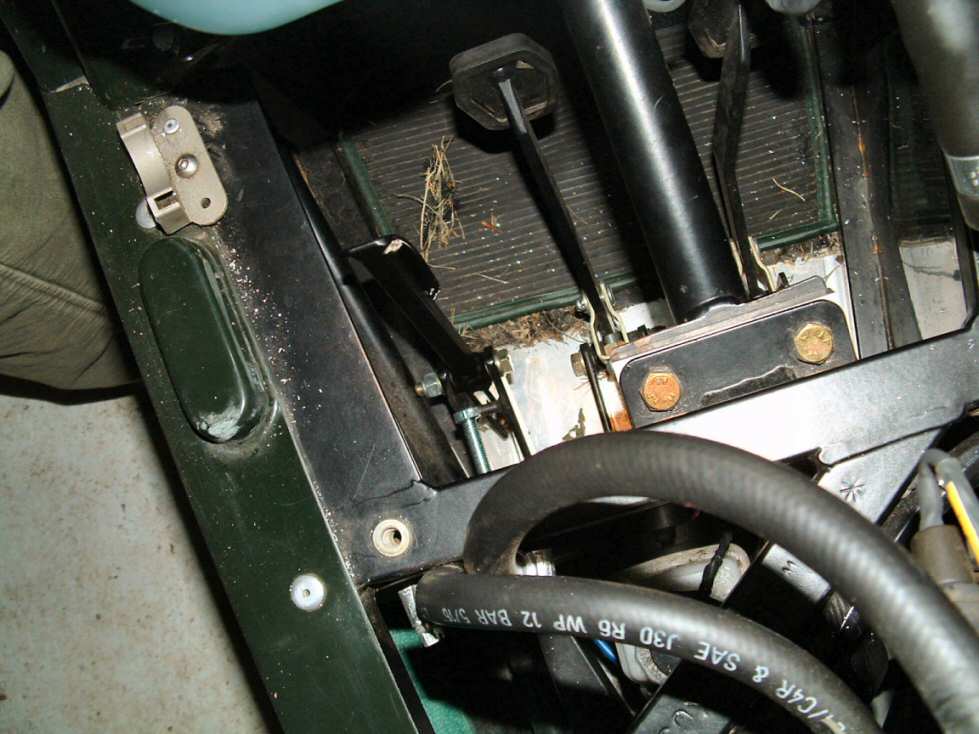
snapping the throttle cable at Combe I knew I had to fit a new one.
The main cause of the break was that I had forgotten to fit a throttle
pedal stop bolt to avoid over stretching the cable. Once the new
throttle cable was fitted this
was easily done and adjusted see pictures 1 and 2.
In addition I also decided to fit a second throttle return spring.
There were two main reasons for this, one was that it's a backup if one
breaks, and secondly it may help reduce or prevent
popping on the overrun.
After
the Stroke Association day, the car sat in the garage
for 2 months without being touched - apart from a good clean. After
snapping the throttle cable at Combe I knew I had to fit a new one.
The main cause of the break was that I had forgotten to fit a throttle
pedal stop bolt to avoid over stretching the cable. Once the new
throttle cable was fitted this
was easily done and adjusted see pictures 1 and 2.
In addition I also decided to fit a second throttle return spring.
There were two main reasons for this, one was that it's a backup if one
breaks, and secondly it may help reduce or prevent
popping on the overrun. 

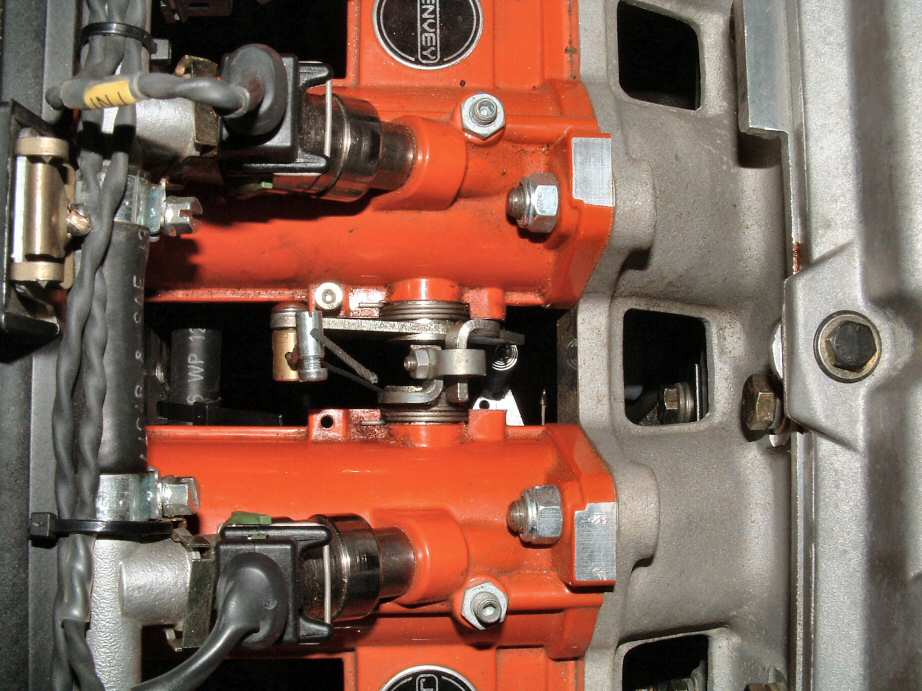
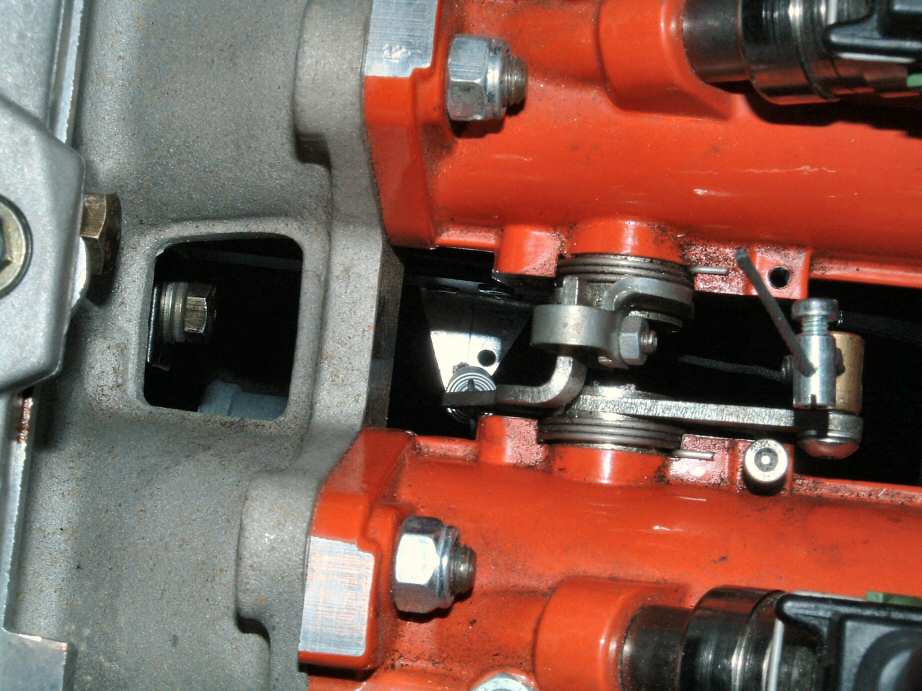
 I got a
small piece of aluminium to make a bracket to fit below the throttle
bodies and cut it to a length
that would put the spring under a little bit of tension with a closed
throttle. I
ensured that it stuck out enough to give the spring a free run and pop
riveted onto a bracket which bolted in position to the head. After setting it all up I then adjusted the tickover
since with the extra spring it was now pulling the throttle closed more
effectively. You can see from the last photo on the right the
tickover adjust screw. I set the tickover to about 850 RPM and it
was running very stably at this. I took the car out for a little
drive and everything seemed fine. Given the poor weather and dark nights
drawing in I decided to call it a day. We'd got some early season
track days booked in February and March, with plans for a dedicated
Westfield only day a little later so I'd get my kicks then! Cleaned
everything up again and waited for the better weather.
I got a
small piece of aluminium to make a bracket to fit below the throttle
bodies and cut it to a length
that would put the spring under a little bit of tension with a closed
throttle. I
ensured that it stuck out enough to give the spring a free run and pop
riveted onto a bracket which bolted in position to the head. After setting it all up I then adjusted the tickover
since with the extra spring it was now pulling the throttle closed more
effectively. You can see from the last photo on the right the
tickover adjust screw. I set the tickover to about 850 RPM and it
was running very stably at this. I took the car out for a little
drive and everything seemed fine. Given the poor weather and dark nights
drawing in I decided to call it a day. We'd got some early season
track days booked in February and March, with plans for a dedicated
Westfield only day a little later so I'd get my kicks then! Cleaned
everything up again and waited for the better weather.
10/10/2003
Suspension, Ride Heights & Corner weights sorted by Pillinger Motor sport
Had the Westfield factory really set the ride heights & suspension settings correctly at the pre SVA and suspension check in late 2002? When Dave Pillinger looked at the car, every setting was miles out & the ride height was 2cm higher than the factory recommendation. They told me that the car may settle, but really, would you expect it to settle upwards! Also the rear springs were so long (12inch) that the rear ride height could not be lowered to the recommended settings. Additionally, one of the rear drive shafts had not had it's splines machined correctly and wasn't seating into the bearing. This caused movement and accounted in no small way for the nervousness of the car. The shaft had to be re-machined by Dave. This further made me question if the settings really had been checked when I took the car to the factory last year. Once Dave Pillinger had sorted everything out, the car was transformed. The twitchy handling was gone and it handled fantastically. He's a thoroughly top bloke who knows his stuff. On the scales the car was 611Kg wet - with 3/4 of a tank of fuel.
24/10/2002
I'd e-mailed Mark Walker at Westfield to ask about the twitchy
handling. He called me back & said that maybe as I was running
the whole thing in as recommended with the dampers set on zero clicks
things may improve when there was some damping set in. He
recommended starting with 6 clicks on the rear dampers and 5 on the
fronts. Over the weekend I changed the settings as recommended and
re-checked the tyre pressures. However with the bad weather &
family commitments I didn't get the opportunity to drive the car to test things out.
30/09/2002
Replies from my WSCC posting on the twitchy handling:
1. I
was still getting this with mine even after the suspension set-up, so last week
I whipped the pads out, smeared the back with a bit of copper slip (the back of
the pads were worn where the pistons were pressing against them), and popped
them back in.
Don't know why, but this seems to have totally cured the brake unevenness, and
they are now much less prone to locking up at the front early! (They're the 4 pot
"upgrade" brakes.)
30/09/2002
Update
after almost 150 sunny miles over the weekend.
Having assumed that paying for the suspension to be set-up by Westfield that
everything would be ok I hadn't checked damper setting and tyre pressures before
Thursday & Fridays evening outings. So on Saturday morning I got round
to checking both.
Tyre pressures (cold) were wildly out. Front L 35psi R 32psi. Rear L
25psi R 32psi. I set them to 20psi all round.
Dampers were a bit out too Rears were both zero clicks, front L 2 clicks,
R 4 clicks. Set the fronts to 4 clicks and left the rears at zero.
Front and rear ARBs were on their softest settings so I was happy with that
& left them alone.
Next outing of 30 ish miles felt much improved. At higher speeds - say
above 60 snapping off the throttle still induced a little twitch left, but
nothing like before. Heavy power on gave a similar small twitch right.
As I'm trying to "gently" run the engine & everything in for
500 - 1000 miles I don't intend to keep testing that too often.
The brakes were starting to bed in nicely also. Front right still locks up
just before left but it's not too worrying. Back discs hardly get warm
& havent even cleaned up yet.
Got back home & re-checked tyres, then re-set front dampers to two clicks
& tried another 30 miler again. Pretty much as before - slight left
twitch on power off, right twitch on big power on. Also slight misfire in
2nd gear at 4000RPM.
Finally - as the manual says for bedding in, I set the fronts to zero clicks,
left the rears at zero clicks & resolved to not fiddle until it's run in.
Now it's got about 200 miles on the clock it's feeling more stable all the time.
27/09/2002
Yesterday
I got over the last hurdle & got my new registration number and road tax.
Right back from the DVLA I had the plates made up at 4:30pm and went out
for a late afternoon drive clocking up 70 ish miles. Went out in 20
mile or so stints with my sons on some reasonably quiet B roads. I did notice the car felt a bit twitchy especially when backing off the
throttle. Admitted everything is brand new & so is bedding in - is this
normal?
It twitches slightly left when backing sharply off the throttle in a dead
straight line - noticed it above 60mph - not really noticeable below. So far I've only checked for the brakes binding, if anything the front right
locks just before the left so I don't think it's that.
The suspension set up was done by the Westfield factory so I've assumed it's ok? Any thoughts?
The set
up was done by Westfield before I got it SVA'd and on the road. I took it
to them for a final once over. For sure nothing will have settled down yet
so maybe I'll just watch it for 500 - 1000 miles & let everything bed in
then check it all again then.
14/9/2003
 Over
the weekend I fitted the new manifold. The old Westfield one came
off considerably easier than it went one. I trial fitted the
silencer to the end of the down pipes but it wouldn't go straight
on. With lots of filing at the end of the manifold together with
heating the silencer inlet with a blow torch
Over
the weekend I fitted the new manifold. The old Westfield one came
off considerably easier than it went one. I trial fitted the
silencer to the end of the down pipes but it wouldn't go straight
on. With lots of filing at the end of the manifold together with
heating the silencer inlet with a blow torch
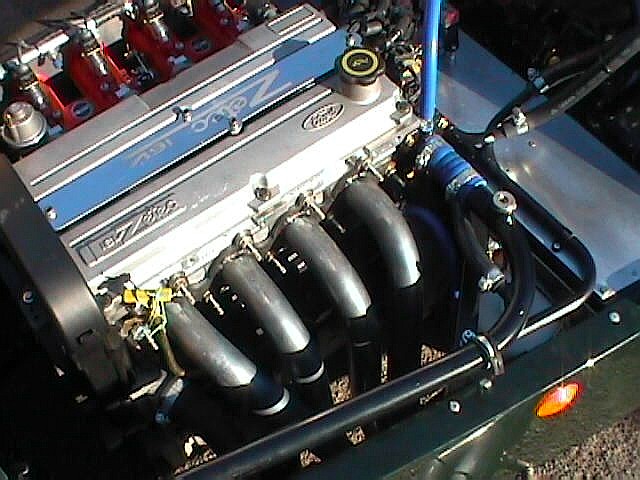
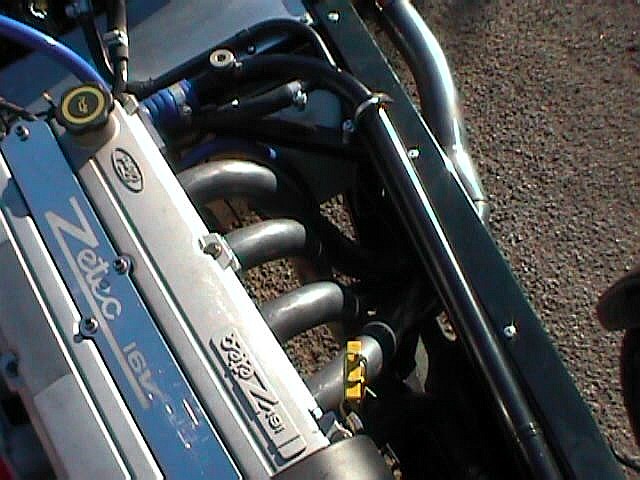
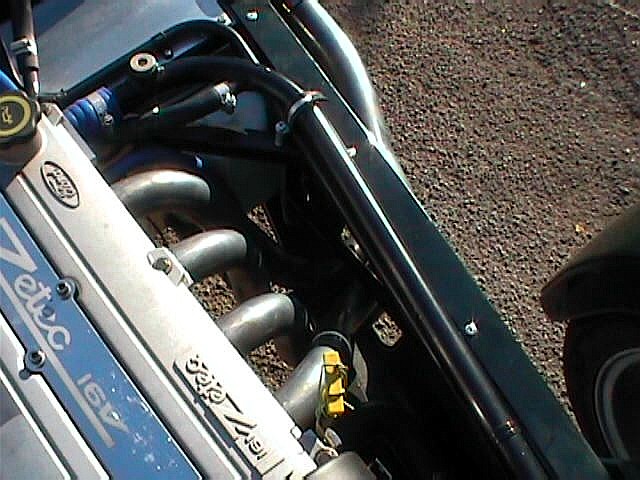
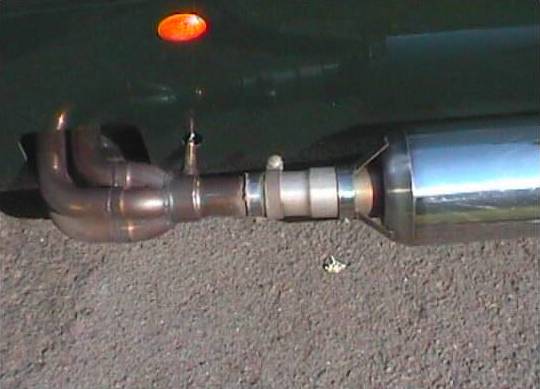
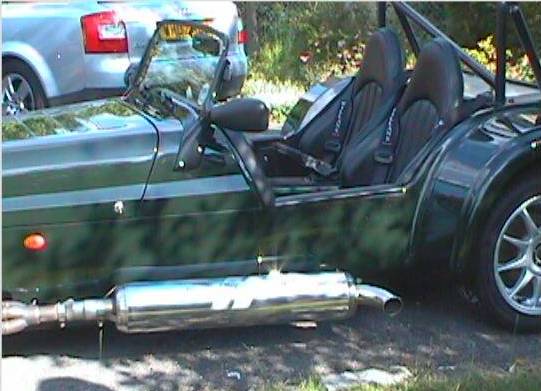
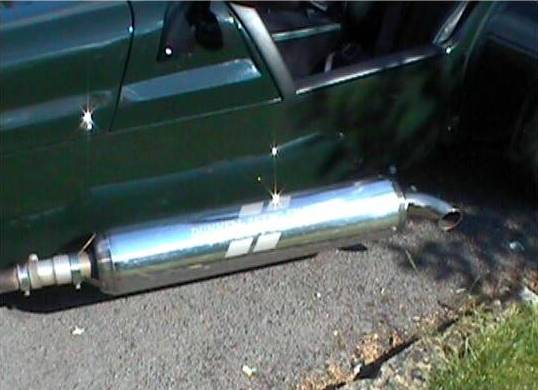
 I finally got the silencer to
fit over the new system. I took it all off again & trial fitted the
manifold to the head. It went on very easily, no fiddling around
trying to get it through the hole in the fibre glass. I marked up
the position for the lambda boss & took the lot to my local garage to
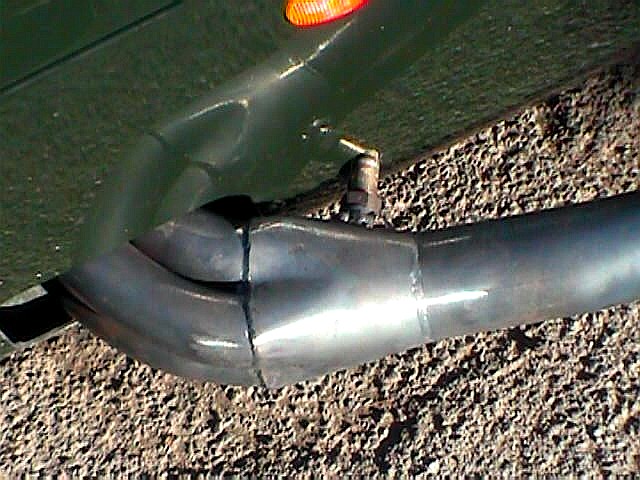
be welded on - this cost a mere £10. Fitting the exhaust and
silencer were then dead easy and the lambda sensor lined up perfectly with
the original hole in the bodywork (picture 2nd from right). I
finally made up an exhaust mounting to hold the back of the silencer in place
and that was it!
I finally got the silencer to
fit over the new system. I took it all off again & trial fitted the
manifold to the head. It went on very easily, no fiddling around
trying to get it through the hole in the fibre glass. I marked up
the position for the lambda boss & took the lot to my local garage to
be welded on - this cost a mere £10. Fitting the exhaust and
silencer were then dead easy and the lambda sensor lined up perfectly with
the original hole in the bodywork (picture 2nd from right). I
finally made up an exhaust mounting to hold the back of the silencer in place
and that was it!
10/9/2003
Dunnell manifold arrives
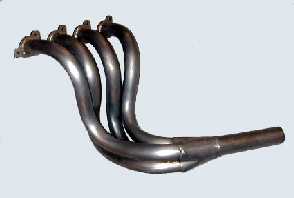 Dunnell
Zetec manifold arrived at last. I spoke to Paul Dunnell the week
before and agreed that they would not weld in a lambda sensor boss as it
would be too awkward to determine exactly where it should fit. They
supplied me with a lambda boss which I need to get welded in the correct
place. When I fit the manifold I should offer it up to the
head, mark the position where I want the boss fitted & take it
somewhere to be welded up.
Dunnell
Zetec manifold arrived at last. I spoke to Paul Dunnell the week
before and agreed that they would not weld in a lambda sensor boss as it
would be too awkward to determine exactly where it should fit. They
supplied me with a lambda boss which I need to get welded in the correct
place. When I fit the manifold I should offer it up to the
head, mark the position where I want the boss fitted & take it
somewhere to be welded up.
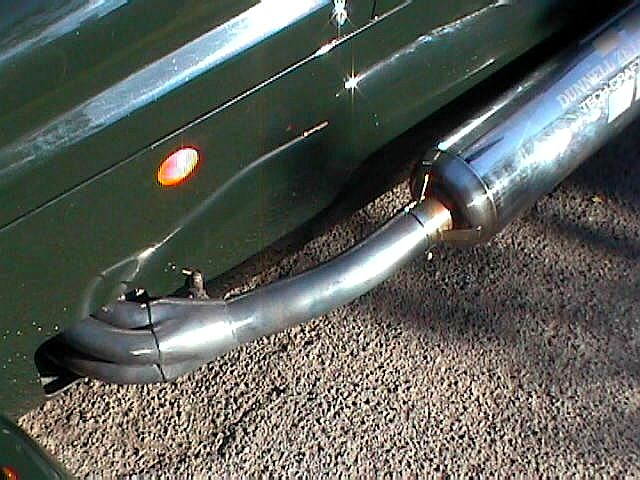
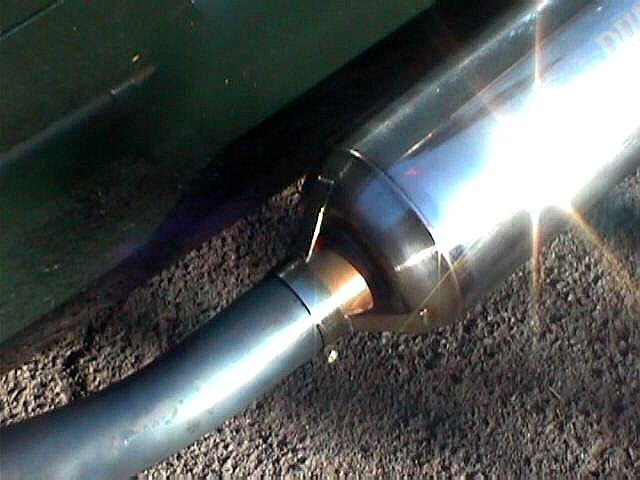
Dunnell silencer arrives
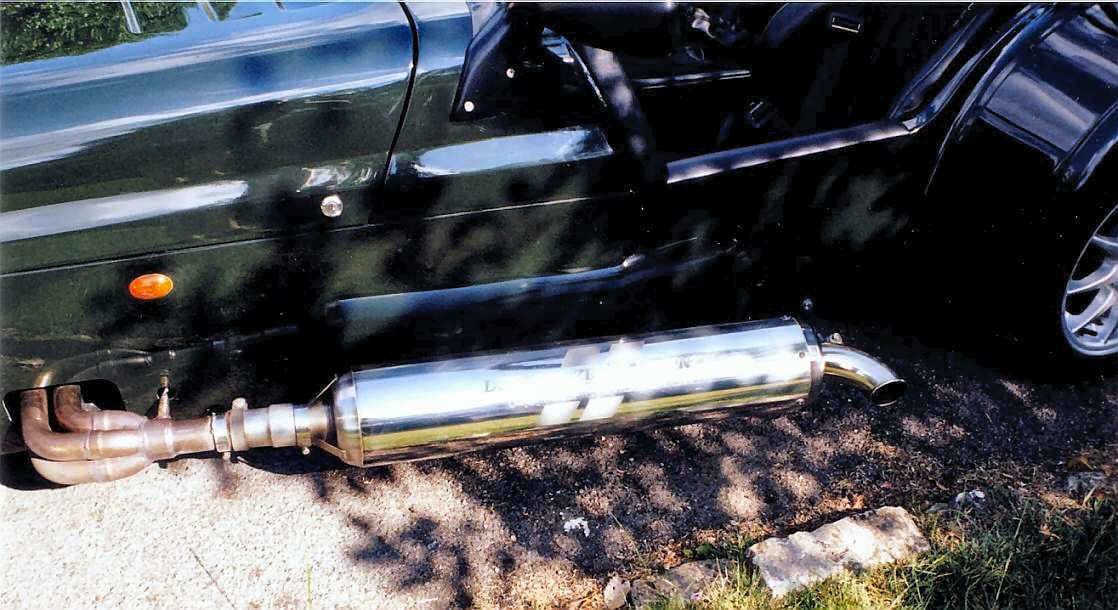 The
new Dunnell silencer arrived. As the new silencer inlet pipe has a
bore of 2.5 inches & the Westfield manifold outlet is just under 2.0
inches I knew I'd have to bodge an adapter. At the weekend I went to
Merlin Motor Sport at Castle Combe & bought an stepped sleeve and a couple
of exhaust clamps. With much hacking of metal on the sleeve, and
liberal amounts of exhaust cement I managed to get the two to join -
without leaks - although it's most definitely not a permanent job!.
The
new Dunnell silencer arrived. As the new silencer inlet pipe has a
bore of 2.5 inches & the Westfield manifold outlet is just under 2.0
inches I knew I'd have to bodge an adapter. At the weekend I went to
Merlin Motor Sport at Castle Combe & bought an stepped sleeve and a couple
of exhaust clamps. With much hacking of metal on the sleeve, and
liberal amounts of exhaust cement I managed to get the two to join -
without leaks - although it's most definitely not a permanent job!.
Jan 2003
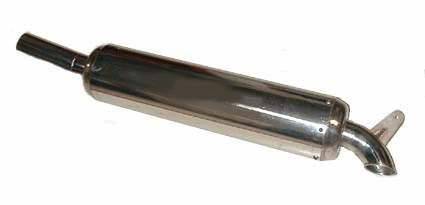 I've
decided on the Dunnell exhaust manifold and silencer. The silencer
is a stainless steel, repackable one with a 2.5 inch bore inlet. The
manifold and down pipes are larger bore than the standard Westfield ones
& more importantly they have been tuned for the Zetec so don't sap any
power. My order is in, and just as soon as the metal fabricators
have started supplying Dunnell with the new systems I'll have one.
I've
decided on the Dunnell exhaust manifold and silencer. The silencer
is a stainless steel, repackable one with a 2.5 inch bore inlet. The
manifold and down pipes are larger bore than the standard Westfield ones
& more importantly they have been tuned for the Zetec so don't sap any
power. My order is in, and just as soon as the metal fabricators
have started supplying Dunnell with the new systems I'll have one.
Haven't done much driving in January of February, the roads aren't dry
enough. Went to the WSCC
Bristol & Bath area meet on February 20th (in my Audi). Lots
of events have been arranged for the summer months :)
1/1/2003
 Finally
I got round to doing the oil and filter change and tightening everything
up. I bought a new
filter, a Fram PH2874 and 4 litres of Mobil 1. To take the old
filter off I had to remove the lower steering column. I did this and
also slightly loosened the filter before running the engine for 5 minutes
to get everything nice and warm. I drained the oil out and removed
the filter. Carefully I poured some new oil into the new filter
before re-fitting it & then filling the engine with 3.5 litres of
Mobil 1. This came to just below the max mark on the dip
stick. Running the engine again for a couple of minutes the level
dropped as expected since the galleries & pump & filter all had to
re-fill. Another 0.25 litres brought the level back to max.
Finally
I got round to doing the oil and filter change and tightening everything
up. I bought a new
filter, a Fram PH2874 and 4 litres of Mobil 1. To take the old
filter off I had to remove the lower steering column. I did this and
also slightly loosened the filter before running the engine for 5 minutes
to get everything nice and warm. I drained the oil out and removed
the filter. Carefully I poured some new oil into the new filter
before re-fitting it & then filling the engine with 3.5 litres of
Mobil 1. This came to just below the max mark on the dip
stick. Running the engine again for a couple of minutes the level
dropped as expected since the galleries & pump & filter all had to
re-fill. Another 0.25 litres brought the level back to max.I also jacked the car up onto axle stands and removed all wheels and set about checking everything in sight for tightness. To my amazement, nothing at all had slackened off in the 600 miles since I'd first got it on the road. I swapped the front & rear wheels and fitted everything back on. Now all I need is a dry day. There hasn't been a single day when the roads have been dry since the start of December!.
31/12/2002
09/11/2002

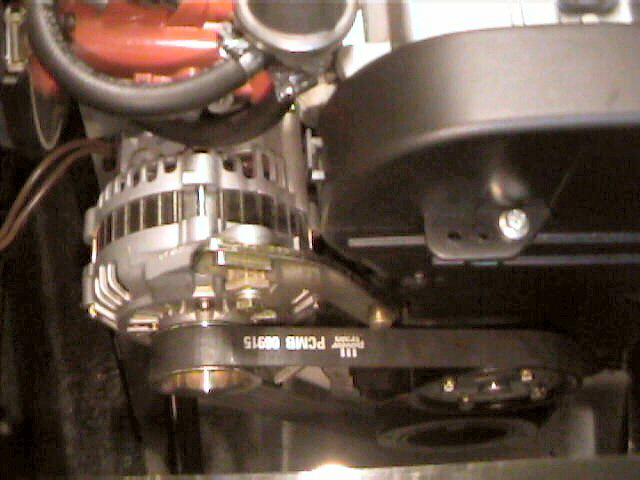 As recommended by Mech repairs I bought a shorter alternator belt.
The original one supplied fitted by Westfield with the engine module was 925mm
long (QH6925). I bought a 915mm one from PartCo
and took off the old one. On checking the alternator mounts I thought
the bushes looked pretty sloppy things. Just little squishy bits of
rubber with the bolt going through. I'll see if I can get some polyurethane ones later.
For now I tightened these bolts up as they were not too tight
either. I took the water pump pulley off and sprayed some PTFE
lubricant onto the hub bearing. I cleaned up all three pulleys
(crank, alternator and water pump) and put on the new 915mm belt.
This now was at the correct tension with the adjuster only a little way
along the bar. Fingers crossed I started up the engine - the result a nice quiet pulley. Hurrah!
As recommended by Mech repairs I bought a shorter alternator belt.
The original one supplied fitted by Westfield with the engine module was 925mm
long (QH6925). I bought a 915mm one from PartCo
and took off the old one. On checking the alternator mounts I thought
the bushes looked pretty sloppy things. Just little squishy bits of
rubber with the bolt going through. I'll see if I can get some polyurethane ones later.
For now I tightened these bolts up as they were not too tight
either. I took the water pump pulley off and sprayed some PTFE
lubricant onto the hub bearing. I cleaned up all three pulleys
(crank, alternator and water pump) and put on the new 915mm belt.
This now was at the correct tension with the adjuster only a little way
along the bar. Fingers crossed I started up the engine - the result a nice quiet pulley. Hurrah!
06 -25/11/2002
ECU Mapping (part 2) & new injectors
I've had quite a few phone conversations and sent a detailed letter, receipts and previous correspondence to Westfield about the injectors. The end result is that we've come to an amicable agreement.
12/11/2002
I took another days leave off and went up to Mech repairs to have the new
injectors fitted and the ECU mapped. They flow tested the new and
old injectors and found the new ones gave an increase of 60% in flow
rate. They also ultrasonically cleaned the new ones to ensure they
flowed at the same rate. Fitting them and re-mapping the ECU took
about 4 hours. The power comes on brilliantly - with the Piper
cam it runs strongly up to 5000 RPM and then just goes wild from 5000 to
7500 - with the soft cut out at 7600 RPM. It reminds me of a
motorbike with a sharp power band. Driving home I looked for quiet
bits of road just to have a quick blast. Great fun!.
ECU mapping (part 1)
I have just had a most frustrating and costly rolling road experience today (and got caught up in the fallout from the M5.South bound closure mid-afternoon). As discussed earlier, Westfield recommended that I have the MBE ECU remapped at an MBE rolling road as by default the ECU supplied by Westfield has the 1800cc standard Zetec map. Mech Repairs in Cheltenham are the nearest MBE rolling road outfit to me in Bath and were recommended by Westfield - they even did the base 1800cc map for Westfield.
The journey up was dire - it was pouring with rain and an accident on the A46 just outside of Bath and then on the M5 junction with the M4 held me up. Furthermore, driving in the wet on the motorway was scary - remember I don't have wet weather gear on the car!. Above about 20mph any water just goes over your head - it was the other traffic antics that concerned me.
Anyway I arrived at Mech Repairs at about 9:15AM. The mapping session at Mech Repairs Cheltenham started well. BTW, I have nothing but praise for Mech Repairs. Many low and medium rev range improvements were made. On trying high-end mapping and well before a full power run was attempted, the guy mapping the software discovered that there was insufficient fuelling above 5000 RPM. He checked the fuel pressure -this was spot on. On investigation, it turns out that the fuel flow rate of the injectors is too low for the 2.0L engine & cam, so the session was aborted (already having cost me over £200, and a day's leave). To say I was annoyed would be an understatement. Remember the engine, Throttle bodies, ECU and CAM were all supplied new by Westfield. At NO point at all in the buying process or while the car was being set-up at Westfield was I given to believe that the parts supplied by Westfield would not work. I was told that the ECU needed re-mapping and was prepared for that - but not that the injectors they sold me wouldn't work on the engine they sold me.
Anyway, Mech Repairs agreed to source injectors for me and let me know when they'd be ready. I'll take up the miss-selling issue separately with Westfield. For info, the fuel injectors supplied in the Jenvey TBs are red top 13 ohm part no 0800/11.
Setting out back for Bath I was pleased with how much smoother the power deliver was at lower and mid end revs, and how stable the tick over was. Previously it was very lumpy at tick over. The journey home was a nightmare though. I decided to go back on the scenic A46 and avoid the M5. Unbeknown to me, the M5 had been closed by a chemical spill and all traffic was diverted onto local roads. It was raining & I was stationary in this mayhem for almost 2 hours. It took 4.5 hours to do the 55 miles back to Bath :( The last problem of the day was that the rubber bush holding the silencer onto the side body sheared with 10 miles to go on the way back home - leaving me with banging exhaust.
During the rolling road session a screeching noise that's been coming from alternator belt water pump pulley was commented on by Mech repairs. They said the belt was too loose - even though it's the new belt supplied by Westfield with the engine & the adjuster is at its tightest. I'll need to look at that soon.
Now 500 miles on the clock. With the bad weather I didn't really get a chance to test out the handling with the new damper settings. Preliminary thoughts were that things were less twitchy, but there seemed to be some bounce at the back end. I'll reserve judgment until I try it in the dry.
Reply from the WSCC regarding ECU
mapping:
2.
Try
Steve Richards Website here.
You will find a rolling road register. I am surprised that the engine is set up
lean, as I would imagine this would be bad for a brand new engine. Westfield set
mine up so rich that it was getting strangled at high revs. I took it to
pro-tune (North London) and they leaned it up and got much more BHP and torque
out of it. Mine is a factory built 1.8 Zetec so they didn't have to do the SVA
on it. I would get it re-mapped sharpish once you pass the emissions
My response:
I
think that could be happening to mine too - won't rev above 5000. I phoned
Westfield to ask about this and confirm the warranty thing. They said it
must get re-mapped - warranty would still be ok. It has the 1.8 Zetec map
but the car is 2.0 Zetec + hot cam. It's cutting out at 5000 RPM - they
reckon it's fuelling so a re-map is essential. Looking at the rolling roads on Steve Richards list, then
Mech Repairs in
Cheltenham seem to be the nearest MBE outfit.
Has anybody any experience of Mech Repairs?
12/10/2002


 In the afternoon
I spent about an hour starting on the new Perspex wind deflectors. This was pretty simple provided you were careful about measuring and
drilling the perspex. Got the left side fitted without any problem. I'll do the right some
time mid week. The following week I fitted the right hand
deflector. I'm very pleased with the result. When driving they make
a major difference compared with no side-screens. The wind buffeting
is considerably reduced and it makes life bearable for a passenger.
In the afternoon
I spent about an hour starting on the new Perspex wind deflectors. This was pretty simple provided you were careful about measuring and
drilling the perspex. Got the left side fitted without any problem. I'll do the right some
time mid week. The following week I fitted the right hand
deflector. I'm very pleased with the result. When driving they make
a major difference compared with no side-screens. The wind buffeting
is considerably reduced and it makes life bearable for a passenger.
07/10/2002
Perspex wind deflectors arrived by Parcel Force from John Moore.
Instructions look very straight forward, so that's this weekends job lined up.
25/09/2002
With the driving around the car park at the SVA centre, and my poodling it up and down our road I'd noticed an oil leak from the crankcase breather unit underneath the exhaust manifold. It's impossible to get to the 3 nuts that hold the breather unit onto the block without removing the exhaust so I decided to do just that. Taking the off the silencer, collector & exhaust manifold was very easy & took only 30 minutes. I undid the bolts on the crankcase breather - 2 were not very tight. Checked the surface of the block, and the breather & cleaned up the gasket. I put it all back together & evenly torqued up the 3 bolts. I also fitted a length of pipe from the breather outlet & ran it down to a bottom chassis bar & cable tied it. I'll get round to fitting a proper oil catch tank later - closer to the 1st time I put it on a track.